
Why Garage Door Weather Stripping Matters
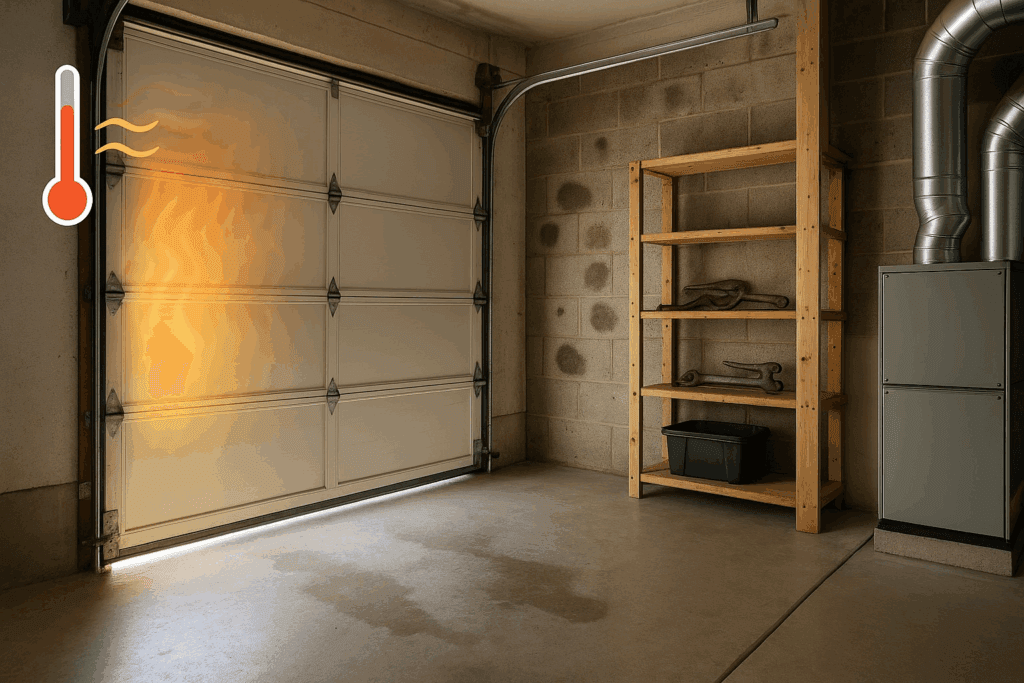
In Houston’s humid and storm-prone climate, weather-related garage door issues are more common than most homeowners realize. Recently, one of our customers in the Midtown area contacted us after a severe rainstorm caused flooding in his garage. Upon inspection, our technicians identified that the garage door weather stripping had completely deteriorated. The bottom seal was torn, the side seals were peeling, and gaps along the door edges were letting in not just water but also debris and pests. After a complete weather stripping replacement, the homeowner noticed an immediate improvement in garage comfort, moisture control, and even lower energy bills.
According to energy.gov, nearly one-third of a home’s total energy loss can be traced back to improperly sealed areas, especially in attached garages. In Houston, where realfeel®28° realfeel shade™26° conditions during the summer are common, maintaining a tight seal around your garage door is essential for both energy efficiency and indoor comfort.
At McKinney Garage Door Repair Co., we specialize in helping homeowners and commercial property owners maintain their garage doors through routine maintenance, repairs, and professional installation. This step-by-step guide will walk you through the process of replacing worn or damaged garage door weather stripping and offer expert tips specific to the climate in Houston, Texas.
What Is Garage Door Weather Stripping?
Garage door weather stripping refers to the set of sealing materials, typically made from rubber, vinyl, or PVC, that line the edges of your garage door. These seals are installed along the bottom, top, and sides of the door to form an airtight barrier. This layer of protection helps block out cold air, high humidity, wind-driven rain, insects, pests, dust, and noise from entering the garage space.
The weatherstripping materials serve multiple purposes. They provide insulation to regulate temperature, minimize moisture intrusion, and preserve indoor air quality. Furthermore, these seals play a vital role in extending the lifespan of your garage door components by reducing the wear caused by external environmental factors.
In climates like Houston’s, where the average wind speeds can reach 30 to 50 km/h during storms, having a durable and properly installed threshold seal and bottom seal becomes critical. Choosing the right type of weather stripping is just as important as performing timely replacements.
Signs You Need New Garage Door Weather Stripping
Understanding when to replace your garage door weather stripping can help you avoid costly repairs, energy loss, and water damage. Below are some of the most common signs that your existing seals are no longer performing effectively:
- You can see daylight shining through the sides or the bottom of your closed garage door.
- The garage feels drafty even when the door is shut.
- Water pools near the edges of the door during or after rainstorms.
- Dust and small debris accumulate despite a closed door.
- Insects or rodents appear in your garage unexpectedly.
- There is visible cracking, tearing, or brittleness in the rubber or vinyl materials.
- Your energy bills have increased without any change in HVAC system usage.
Many homeowners in Houston first notice the need for replacement during seasonal shifts when extreme temperatures highlight these performance issues. If any of these symptoms appear, replacing your garage door weather stripping can make a big difference in both comfort and cost savings.
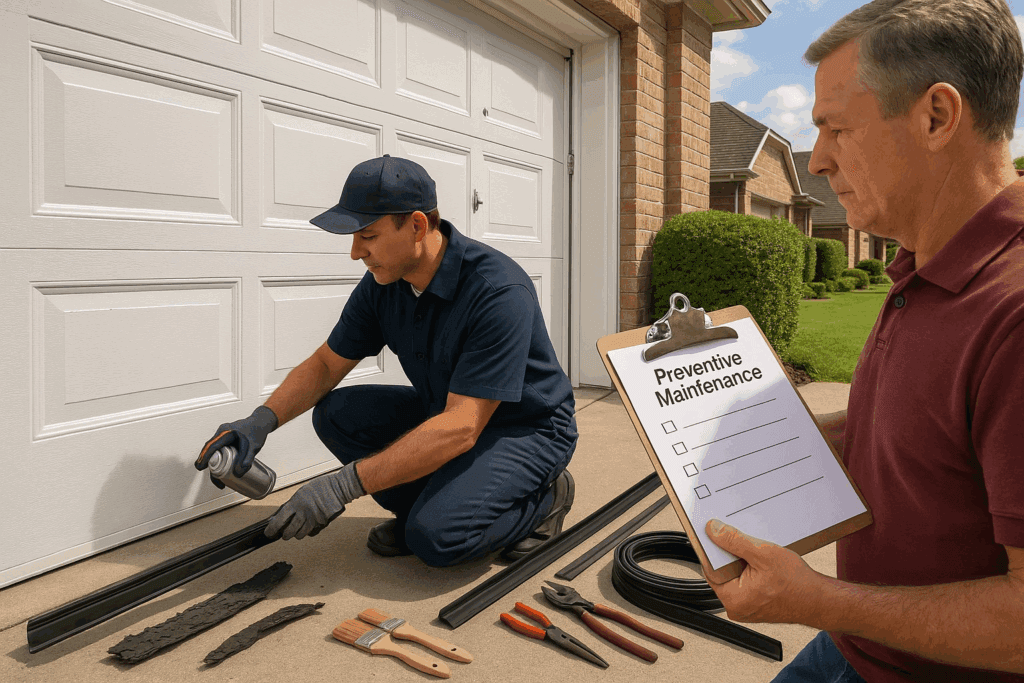
Tools and Materials You Will Need
Before you begin, make sure you have the proper tools and weatherstripping materials to complete the job. Quality materials and tools will ensure a long-lasting seal and reduce the chances of common mistakes. Here is a list of what you will need:
- Tape measure
- Utility knife or heavy-duty scissors
- Flathead screwdriver or putty knife
- Rubber mallet
- Drill or hammer (depending on fastener type)
- Replacement weather stripping (bottom seal, top seals, and side seals)
- Cleaning rags and mild soap
- Straight holder or mounting hardware if required
- Caulking gun and waterproof caulk (for added weatherproofing)
Choosing the right material is essential. Use high-grade EPDM rubber for the bottom seal, heavy-duty vinyl for side seals, and flexible PVC for top weatherstripping. For garages exposed to direct sunlight or frequent storms, consider using a brush seal kit or cold-weather cushions for added insulation.
Step-by-Step Guide to Garage Door Weather Stripping Replacement
This comprehensive guide will take you through each phase of the replacement process to ensure a perfect seal and a successful installation. Following these steps carefully will protect your garage from weather, pests, and energy loss.
Step 1: Remove the Old Weather Stripping
Begin by disconnecting your garage door opener and manually opening the garage door. Carefully inspect the old weather stripping. Use a flathead screwdriver or putty knife to pry away the old seal, being cautious not to damage the underlying door surface or retainer channel.
If nails or screws were used in the original installation, remove them gently using pliers. Pull away all rubber, vinyl, or brush materials and discard them. Take note of how the old material was attached, as this will help when installing the new garage door weather stripping.
Step 2: Clean and Prepare the Surface
Once the old stripping has been removed, take the time to clean the surface thoroughly. Use a damp rag with mild soap to wipe away dirt, grease, and old adhesive. If necessary, allow the surface to dry completely before proceeding.
A clean surface ensures that new weatherstripping materials will adhere securely and last for many years. In areas where corrosion or rust is present, lightly sand the surface and apply a rust-inhibiting primer before continuing.
Step 3: Measure and Cut the New Material
Measure the length of the door frame’s bottom edge, both side jambs, and the top header. Use a tape measure to record precise dimensions. Then, cut the new weather stripping materials accordingly.
For example, a typical residential garage door may require a bottom seal that is eight to nine feet long, with side seals measuring over six feet each. Cut carefully using a utility knife, ensuring that the cuts are straight to avoid gaps during installation.
Step 4: Install the Bottom Seal
Most modern garage doors have a metal retainer or straight holder along the bottom edge. This track allows for a T-style or bulb-style rubber seal to slide in. If your garage door uses a nail-on threshold seal, position the rubber along the bottom and fasten it using screws or nails.
Insert the new seal into the track channel by folding the rubber slightly and feeding it into both sides of the retainer. Once fully inserted, adjust it evenly to prevent bunching or stretching. The bottom seal should lie flat against the concrete floor to ensure airtight and watertight protection.
Step 5: Install Side and Top Seals
Close the garage door completely. Starting with one side, align the vinyl or rubber weather stripping so that it just brushes against the closed door. Attach the seal to the door frame using screws or nails spaced every twelve to sixteen inches.
Repeat this process for the opposite side, ensuring the flexible flap maintains consistent contact with the garage door without pressing too tightly. For the top seal, align the strip along the top header and secure it in the same manner.
This careful alignment forms a tight seal that helps maintain interior temperature and blocks dust, drafts, and unwanted pests.
Step 6: Test the Seal and Make Adjustments
Reopen and close the garage door several times to test the new seals. Observe whether the door glides smoothly without resistance and whether any light is visible through the edges.
Check for consistent pressure between the door and weather stripping along the bottom, sides, and top. If you notice any gaps or uneven contact, make necessary adjustments by repositioning the seals or tightening fasteners.
Proper installation will result in an airtight, weatherproof barrier that functions efficiently and quietly.
Special Considerations for Houston’s Climate
Living in Houston means facing high humidity, intense sun, sudden rainfall, and even hurricanes. Homeowners must select weather stripping materials that withstand these conditions.
Choose materials rated for realfeel®27° realfeel shade™24° environments and fluctuating temperatures. EPDM rubber offers excellent flexibility and resistance to ozone, UV rays, and extreme temperatures, while premium vinyl performs well in moisture-heavy areas. PVC material is suitable for top and side seals, especially when paired with brush inserts for extra protection.
Regular maintenance is also critical. Inspect seals every season, especially before hurricane season. Look for brittleness, moisture buildup, or separation from the frame. Routine upkeep ensures your seals last longer and your garage remains safe and energy-efficient.
Benefits of Replacing Your Garage Door Weather Stripping
The advantages of a timely weather stripping replacement go beyond appearance. They provide tangible value, including:
- Significant improvement in energy efficiency, which can reduce energy bills by keeping warm or cool air inside the garage.
- Enhanced insulation and comfort, preventing temperature fluctuations that affect both the garage and adjacent rooms.
- Improved protection against moisture, reducing the risk of mold, mildew, and water damage on floors, drywall, and stored items.
- Effective pest prevention keeps out rodents, insects, and other unwanted guests.
- Reduced dust and noise intrusion, creating a cleaner and quieter garage environment.
- Extended lifespan of the garage door, hardware, and garage door opener by minimizing exposure to the elements.
Common Mistakes to Avoid
While weather stripping replacement may appear straightforward, homeowners often make avoidable errors:
- Using low-quality materials that crack or warp under Houston’s sun and humidity
- Failing to clean the surface before applying new seals
- Choosing the wrong type of bottom seal for the door type or track system
- Compressing the seal too tightly may cause friction and premature wear
- Skipping regular maintenance and inspections
Avoiding these common mistakes ensures long-term success and protects your investment in your garage door system.
Final Thoughts
Replacing your garage door weather stripping is one of the most cost-effective ways to protect your home, improve energy efficiency, and enhance garage comfort. A tight seal guards against weather extremes, prevents moisture damage, and keeps pests at bay, while also contributing to lower energy bills and better climate control.
In Houston’s challenging weather conditions, where intense heat, rain, and wind are frequent, maintaining effective seals around your garage door is more important than ever. Whether you choose to follow this step-by-step guide on your own or decide to contact a professional, staying proactive with garage door weather maintenance can save you time, money, and stress in the long run.
How Can McKinney Garage Door Repair Co. Help You?
At McKinney Garage Door Repair Co., we take pride in offering comprehensive garage door solutions tailored to Houston, TX’s unique climate and architectural styles. Our team of experienced technicians provides professional installation of premium weatherstripping materials designed to withstand heat, humidity, and storm conditions.
Whether you need help sealing a brand-new garage door or replacing worn weather seals, we offer fast, reliable, and affordable service. We use only top-tier rubber, vinyl, and PVC components to ensure a long-lasting, airtight barrier that protects your property year-round.
📍 Visit Us:
McKinney Garage Door Repair Co.
1200 McKinney St, Houston, TX 77010, United States
📞 Call Now:
(281) 549-0009
Reach out today to schedule your weather stripping replacement or to receive a free consultation. Let us help you create the perfect seal for your garage and bring peace of mind back to your home.
Frequently Asked Questions (FAQs)
1. Can I reuse old garage door weather stripping if it looks intact?
It is not recommended to reuse old weather stripping, even if it appears to be in good condition. Over time, the material may lose flexibility, develop hidden cracks, or weaken its sealing properties, making it less effective at blocking air, moisture, and pests.
2. How long does it take to replace garage door weather stripping?
For most standard garage doors, weather stripping replacement takes about one to two hours when done properly. However, more complex doors or doors with damage to the frame or track may require additional time for adjustments or repairs.
3. Is foam weather stripping a good choice for garage doors?
Foam weather stripping is generally not ideal for garage doors, especially in climates like Houston. It tends to compress and deteriorate quickly under pressure and temperature changes, making rubber, vinyl, or PVC better long-term options.
4. Will new weather stripping make my garage completely airtight?
While high-quality weather stripping significantly improves insulation and reduces air leaks, no garage can be made 100% airtight. However, a proper seal will drastically minimize drafts, moisture, and dust intrusion, making the garage much more energy-efficient and comfortable.
- How Climate and Humidity Affect Garage Door Repair Needs
- How to Extend the Life of Automatic Garage Doors in Houston, TX
- How to Extend the Life of Your Garage Door Opener in Houston, TX
- How to Extend the Life of Your Garage Door with a Tune-Up in Houston, TX
- Garage Door Maintenance in Houston, TX: Affordable and Comprehensive Services